


Hello again my lovely friends!!! I am always so glad to have you around, wishing me the best, sending me so much good energy and follow my work and my thoughts when I post on my Facebook page.
Many many times you had ask me how I make the sharp edges on my cakes, or how it looks so smooth. I had looked for the same information from the first time I saw those amazing sharp edges from Planet Cake in Australia. I bought their book, i followed all their helpful information, but honestly I never got the edges I wanted: razor blade!!!
How I came up with this:
(and I apologize with whomever also came out with this idea if I am providing others with what I found out by merely mistake of calculation)
Back in November I started using Duff's fondant which is great for modeling and it works nicely because is doesn't dry so hard and is amazingly pliable. I believe is a combination of fondant and modeling chocolate which works perfectly for me all the time under any circumstance.
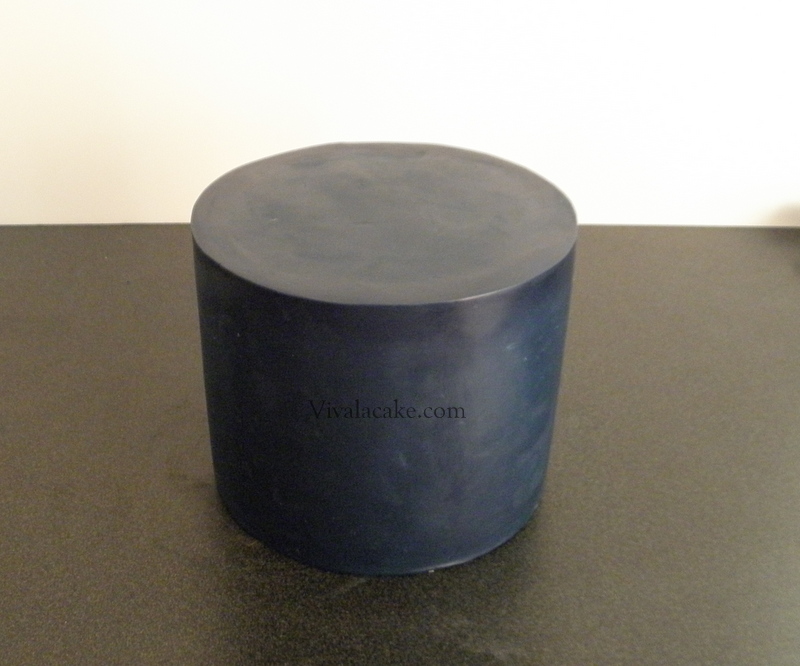
The, for my mom's cake I needed a deep purplish color, and I had some modeling chocolate in blue and some purple fondant and I mixed them together along with some black modeling chocolate as well. when it was time to cover the cake, it kept tearing, then my super clever mom told me: "Why don't you cover it as if is a drum??" and that was I did then I started smoothing the edges and all seams disappeared, and then a big bright light lit my head: EUREKA!!!

But Ironically, I wasn't taking any picture of this process actually; instead I was taking pictures of the bottom tier for a different tutorial :))
How I came up with this:
(and I apologize with whomever also came out with this idea if I am providing others with what I found out by merely mistake of calculation)
Back in November I started using Duff's fondant which is great for modeling and it works nicely because is doesn't dry so hard and is amazingly pliable. I believe is a combination of fondant and modeling chocolate which works perfectly for me all the time under any circumstance.
The, for my mom's cake I needed a deep purplish color, and I had some modeling chocolate in blue and some purple fondant and I mixed them together along with some black modeling chocolate as well. when it was time to cover the cake, it kept tearing, then my super clever mom told me: "Why don't you cover it as if is a drum??" and that was I did then I started smoothing the edges and all seams disappeared, and then a big bright light lit my head: EUREKA!!!
But Ironically, I wasn't taking any picture of this process actually; instead I was taking pictures of the bottom tier for a different tutorial :))
Then I started making my own fondant by combining 50/50 modeling
chocolate and MMF, once they are mixed then you can color it using your
regular food coloring. Why I use this way of covering???: because I hate, hate, haaaaaate dealing with fondant!!! this method is perfect for avoiding : air bubbles and tearing fondant and will give you sharp edges. But wait a second: no mater what technique you use for getting sharp edges on your fondant, take this in consideration:
- ganache allows you reach sharpie edges (buttercream sucks for this job)
- This 50/50 modeling chocolate and MMF combination, bring the best of both: flexibility and pliability
- IT ALWAYS TAKES TIME FOR GETTING THE EDGES!!! but experience will make you reduce the time, but not at first.
Now Let me show you how I cover most of my cakes:
This is based in a ganache covered cake. Yes you can do it buttercream covered cake but the final result will not be the same!!!! so keep that in mind if you decide to cover your cake this way.
I first start on a Ganache covered cake: all the time I use the upside down technique created and freely posted at CC by amazingly artist Jeff_Arnett. I use his method both butter cream or Ganache.Buttercream might take longer and it is necessary to use an all butter/ butter cream recipe (no crusting ones), but again I need to insist: trying to achieve sharp edges, means Ganached cake!!!
Put this 2 recipes together: It means make them separated, then mix them, then color it if you wish.
Great things I find in this fondant :
- Awesome taste
- It does not dry so hard as premade fondant or Gumpaste, so I can make my cutouts decoration ahead of time and still manage to place them perfectly on the cake
- Pliability is incredible
- since you are adding MMF, you do not need to use chocolate colors to color the modeling chocolate, just the regular wilton or americolor or what ever color you use.
- this is meant for smaller cakes, anything larger than 10" should be worked in a different way
 |
| Once your cake is perfectly cover, ( remember that any imperfection on your ganache, will show off on your fondant ) it is time to measure the diameter and height of your cake. This cake is a 2 tiers cake topper 6" bottom 8". Each one is about 5" tall |
 |
| We need to roll a large piece of fondant, large enough to caver all the diameter and height of our cake. i always roll my fondant using two sticks, or wooden dowels etc, anything that keeps my fondant on same thickness. It is also a good Idea to smooth your fondant with your plastic smoother or pop any air bubble you might find |
  |
| Remember how much your cake diameter and height was?? it is now time to make sure your fondant strip is long and tall enough to cover the sides of your cake. I use a long ruler I found at Home Depot, I now cut the fondant strip using my ruler and pizza cutter. Always measure twice then cut. |
 |
| Paint the cake using either water, sirup or just shortening, make sure is well covered. Any part that is not painted, might produce an air bubble on your cake. |
 | |||||
| Take your fondant strip and making sure the fondant is touching the bottom of the cake, start placing fondant strip all around your cake. This is a really small cake and yes you can lift the fondant, remember is a combination of fondant/modeling chocolate. |
 |
| If you do not feel secure about just lifting the fondant you can roll the strip all around the rolling ping and then unroll it all around your cake. |
 | ||
| Once both sides touch use a ultra sharp blade to cut the extra fondant |


So this is the part when you understand why making a mixture of 50/50 modeling chocolate/MMF comes in handy. You need to add some water using your brush. Then you need to smooth using both your fingers and the fondant smoother. You might think this is tedious work, but no matter how you cover your cake in fondant or what technique you use, it will always take time to achieve a great final result.

This Picture show how perfectly you can smooth this seams and make them disappear. Most of the time I do not waist so much time on this: I either leave it for the back of the cake or if you are using stripes as your decoration, cover this with a fondant stripe.

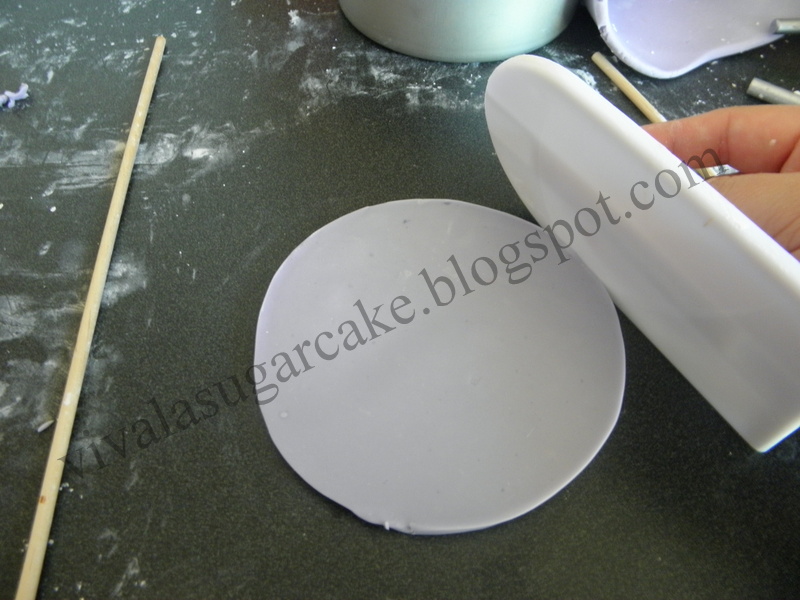
It is time to cover the top of the cake and when the fun really starts: Using the pan you used to bake your cake, cut the shape out of a rolled fondant piece.
Smooth before placing on the cake, always using the fondant smoother and your fingers


Apply more liquid if needed

Smooth always pushing the fondant so it sticks nicely on the sides

Push, smooth, stick


Cut all around the edge with a new blade, that will bring a really clean cut (well this doesn't look so clean)

Wet, smooth, and smooth and smooth (this takes around 10 minutes)


Final result

Here is the cake !! Lovely, isn't it ???


Here is a Sample of cakes I made using this technique
Cakey Hugs, Joly


