Thursday, June 27, 2013

Tutorial: How to make Smooth Ombre Buttercream cake


Hello My lovelies Here I am one more time to share with you some nice techniques I try.   I apologize if there is any body else who came up with this before, but honestly with so much going on in internet, it looks like no Idea is a unique idea. I have seen this ombre buttercream recreated on the cake as ruffles, dot- spoon dragging,  etc but honestly, though is way beautiful look, I am to lazy for all those dots and ruffles. So I decided to simple make it smooth as I usually smooth my butter cream cakes, and it actually worked!!


Let's start :


I only use 4 colors: 3  pink degradation  (ombre) and white. For this 6" cake I only used about 1/2 cup butter cream  ( for upsidedown technique you need an all butter butter cream, no crusty recipe) on each color.


 I torte and fill a cake, this is a  6" cake. I always use upside down technique for any of my cakes, either if cover in butter cream or ganache.Chill the cake to avoid much crumb,  For this cake you should cover the very top of the cake, place a piece of "Freezing Paper" , then  smooth with fondant smoother, place a larger board on top of the paper and then flip the cake. What you see on this picture is actually a cake that is upside down. I apply some extra butter cream for the border, put enough so you don't drag much crumb.  Then the next pink tone which is the lighter color, It does not need to be perfect, but I always try to at least keep the butter cream line as same size as possible.


 Continue applying the rest of your colored butter cream, and ending on the darkest pink.


sing your turn table or lazy Susan and making sure you will keep as STEADY hand as possible, It is now the moment to get that beautiful butter cream all smooth and perfectly mixed together.
The trick is to make only one dragging a large spackling  knife, or bakers knife  or bench scraper (I use Wilton's) and always and I REPEAT  ALWAYS keep a steady hand!!!

Always keeping the your wrist on the same position. Never move your hand, only turn the turn table


OHHHH!!! How much I love this cake!!  I really took all the cuteness in my heart and then reproduced it!!!

Remember I  only have boys, so baby girls are my weakest  point, I can't stop myself but going extra cute on any baby girl cake!!! LOL  <3  


Cakey Love, Joly 

Saturday, June 15, 2013

How to: Making Chocolate Fondant


 It is so nice When I have the chance, plus the time to start a new post and actually have it ready in less than 3 days, that really means I am having good quality time to keep on posting. This Summer I decided to do more things for myself and my kids, so I slow the number of orders during the summer break. Anyway I have always hated working during this time of the year; I know it is the wedding season etc but it is so much stress to have a decent cake that looks as professional as I like them to look,  with all this heat and humidity we bakers need to endure during the summer time!!! two days ago outside temperature was 87F but humidity made it feel like 95F and my cakes felt it as 104F.
     Specially here in the South, most people and specially Brides, prefer all buttercream cakes opposed to fondant. In Australia where British sugar techniques had to be replaced for more adapted- to- climate- techniques,butter cream (Royal Icing, indeed) was replaced by ganache, and marzipan was replaced by this elastic dough (which I adore) called fondant!!!

    Every body loves the incredibly smooth look fondant brings to the cake and how it is transformed in almost anything your imagination (and few other tricks) can bring to your cake creation;   Bad thing for fondant  is many many years of awful taste fondant.  that some fondant producer brought to scene. Yes I know, it really tasted bad, and honestly most of market brands taste like rubber!! Fortunately, some amazing people started to experiment and they actually create some  good tasting fondants. One of those fondants is called MMF (marsh-mellow fondant) and you can find recipe HERE it is not the best fondant, I personally don't use it for every single cake but it is so elastic and easy to work with, and  it also taste so  good, that everybody is actually using it for all their cakes. It is also easy to make and its shelf life is also pretty good.


I have used a different recipe for a little while and I am so satisfy with final results. I have no idea if someone else already thought about it  (I suppose yes)  This more than a recipe, is a mixture of two different mediums:

                                                  MMF and Modeling chocolate,  find recipe HERE


 What is it so good about this mixture:

  • Taste, yummm!!!
  • No need to get candy color to get the color you need , regular edible colors like americolor, wilton, Baker's choice it is just fine
  • yes, you can cover a cake with it,  see how HERE
  • Yes, you can model figures
  • Yes, you can shimmer it
  • airbrush it 
  • and BIG ETC!!! 

This is How I make it:

You can use any candy melt or chocolate, any color, any brand, the result will be always the same, maybe the taste will vary depending on chocolate brand, I am using black melts because I need deep black fondant for decorating my cake, modeling chocolate recipe is HERE 

Modeling Chocolate Troubleshooting:

  • To avoid fat separating from chocolate, do not over melt the chocolate, just enough to make it melt. I prefer to use the microwave and melt it in sections of 25 secs until is melted
  • once is melted, stir to make sure it is all melted and also to drop the temperature a bit. If chocolate is too hot and we add the syrup, that basically makes the fattening to separate from chocolate. 
  • When you add the syrup, do not stir  so much , just enough to mix it together

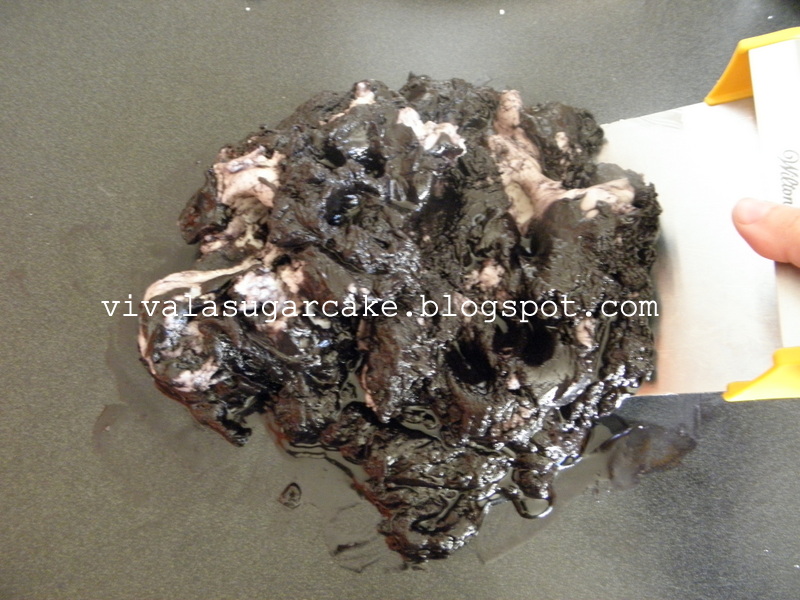
Once Modeling Chocolate is ready, let it cool for about 30 min or less. You can still mix it at this stage (if you are in a hurry) but again fat might separate from chocolate, please do not freak out if this happens, you can always fix it . Mix the modeling chocolate and MMF, about 1/2 lb of each, or any amount in equal parts. What ever is easy for you to manage.

I use my scraper to help me mix it when it sticks on my working table. Some of the fattening ( as you can see in this pic) was released from a too warmed modeling chocolate (YES, I was in a hurry,LOL)


Add some powdering sugar and keep kneading, just as when you knead your regular fondant 


 I need a really deep black color, and at this stage chocolate fondant is more on the grayish shade. I always use Americolor Super black for a really deep black

These are examples of how chocolate fondant would be colored, any shade, any color, using your regular fondant gel or paste colors.

If I want to color some chocolate fondant for my modeling figures, I start with  White melts, or white chocolate mix with white MMF. once is all mixed, I cut it in 1/4 lb pieces and then I color it and storage it.

85% of my work is done using this mixture and I am so incredibly happy with the results: I use it for modeling all of my figurines and for covering my cakes with my Fondant Wrapping technique 


Cakey Hugs, Joly.


Tuesday, June 11, 2013

How to: Double Barrel Cake, this is tall cake, fellas!!!!


 Double barrel cakes are extreme!! these cakes are super tall: one single tier can be taller than 8" and if you dare to build the right structure, it can be even taller. These are great for making bird cages cakes or simply to go for an elegant and sleek design on your cake. But How I can make this cake, and how it can hold all the way up??

 If you dare to build it, I know you can , here I will show you how easy it is to accomplish.


To start: If you bake on 2" tall pans, like I do, then you will need  4 cakes ( on the desired diameter) baked  on a 2" tall pan . lets say 4 cakes 8"x2" . By request, I did not torte the cake as much as I do, any way torting your cake in many layers, brings less stability to your cake.  Remember  to also  use a firm cake recipe, pound cake is always great for extreme cakes.


Second important Thing on your cake: dowels!!!! there is no cake with out dowels ( at least no extreme ones) I use: drinking water PVC pipes which I cut with a PVC cutter , or hollow dowels from Wilton.com  or simple bubble tea straws less pricy BTW.  And this is the equation for dowels (at least the one I use):

                   The bigger the cake  =   The bigger the dowel 

 Cake diameter-2

6" cake = 4 bubble straw 

10" cake = 8 hollow plastic rods   etc...


How many rods, dowels or straws you will need also depend on the weight you will put on the next tiers. Put better, bigger dowels on your bottom tier if you are planning to put 5 more tiers on top.


Next step is to place a smaller cardboard (I use Foam core always) on the top of your first cake. This means if your cake is 8" diameter, then you will place a 7" diameter foam core or cake cardboard .


Remember this cake is based on 4 cakes of 2 " tall each cake, the rest of your layers will be placed on top of this board. What's the board for?? stability !!!!


I forgot to place a ruler next to this lady so you can check how tall and elegant this baby is!!!! but I know she was taller than 9"  this was a 12" diameter double barrel cake, good to serve 100 guests.  This cake was all buttercream with coconut on it, it looked soo heavenly !!! and romantic!!!


In the case that you are covering in fondant , best way to go will be  GANACHE!!! it will stay perfectly sturdy!! best way to cover it  with fondant  you can find it HERE


 Lovely and Heavenly Cake for  Mr & Mrs Stephen McGuffin