Monday, September 30, 2013

Sofia The First Cake


Last Month I was asked to make a Sofia The first Cake, and I was about to die!!! I've being waiting for this to happen long time ago. I also appreciate my friend Aliya for all her trust in making this, trying different techniques and staying away from ruffles and crowns when I designed this cake. 


It turned out bigger and heavier than I had expected but trying something new also means some hours of try and error . At the end I felt really pleased using the wafer paper I bought several months ago (and I was afraid to used it) along with the paper die cut pouch I got from Michael's store (a little tricky to use I must add) 


I also tried the bi dimensional technique, that normally should be used on the top of the cake because it turns really heavy; and on this cake just the part of the hair on Sofia, turned out really heavy and tricky to secure on cake. BTW, I must add that the hardest part to make on figurines is the mouth, lips and mouth expression, I redid it 3 times!!!! 


This cake is a 8"x3"all butter cream  on bigger tier and 7"x8" ganache and fondant on topper tier using the DOUBLE BARREL technique that you can learn HERE

Thank you so much for checking on my blog!!! I love to see you here 

xoxo, Joly 

Wednesday, September 18, 2013

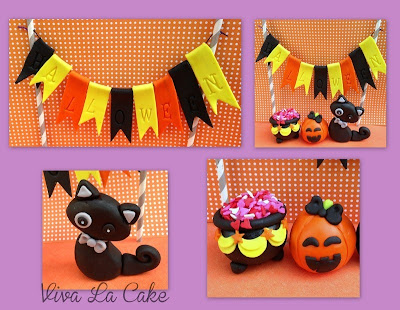
Witches are the new Zombies


The second best time of the year is almost here, and I am more excited than mi own kids, LOL. The basically love the candies: get them, sort them, eat them and get sick of them!!! but I love all decor, grown up parties, all the crafting, visit our local Haunted House and watch all those great spooky movies I love to watch every single year!!! Yes, I am sooo Ready for Halloween !!!!


Witches will be the new trendy, oooh yes!!! forget about those nasty zombies who lack of any glamour and are so not fashionable!!! With the coming  new season of American Horror Story  this October 9th a new  chapter of beautiful, sexy, wicked and terrible witches will be on all TV's this October!!! wooohooo (I am dying here to watch it) 


Since Witches are cuter, smarter and trendier than Zombies, I decided to play around a little bit with my left over fondant , try new techniques and new ways to keep these cake toppers  from falling apart and the most important part:  finding the best way to mail them everywhere. 


I will be making toppers, cake sets that includes name plaque, number, topper and extra decor everything ready for your cake: you put the cake and I make the hard and  tedious sugar work 


If you are interested in ordering any sugar topper and cake set please email me at 
vivalacake@hotmail.com


Sunday, September 8, 2013

How to: Plaid Effect

Hello my lovelies!!! Yeah I know I know, I've being a little bit quiet lately but also busy on some cakes and whenever I have some free time, that goes straight to "My Family time"; we took a short break and headed to Orlando, Fl the happiest place in the world (at least if you go to all those theme parks)

This week one of my cakey friend told me she was wondering how to make the Plaid Effect on some fondant because she needs to make some cupcake toppers and have that effect on some; When I made the Lalaloopsy cake   part of her dress included some plaid and this is how I made that part.


Let's first talk about the materials you will need and how to figure out the size of your lines.

You will need:
  • Stencil sheets (to actually make stencils) 
  • ruler
  • x-acto knife with new razor 
  • I used a circle cutter of 2 and 1/2 " as reference for the size of my lines
  • cutting board or wooden board


Start by marking your lines. the distance for this particular stencil is only 1/4" so I mark a point ever 1/4". I marked each line 3 times so I will be totally sure my lines are completely straight.  Then trace the lines.


Once you have traced the lines, place and X every other space, so that is the line you want to cut and leave the rest alone. The x-acto knife needs to be brand new, at least the razor: now using the ruler, cut the lines, hold the ruler firmly, take a deep breath and cut with straight and steady hand. Remember always to use a wooden board or a cutting board to make this part, you don't want to mess up your beautiful table


As you can see I already have a few of these, they are easy to make and cheap. 


 So now you have the stencil, yeahhh you did it yourself!!! now is the time to actually USE it!!!


I used powder colors for this, it is easier, and super fast to make and when you use powder colors, the intensity is always different depending on how much powder you leave on the brush and that is a good effect for this plaid. Place the stencil and hold it firmly but not too hard so you don't  mess up the fondant. Remember this round is meant to be use on a cupcake topper. 


Now, the easiest part, well not so easy but you will do it great, lift the stencil, turn it around and instead of being vertical lines, now you will make the horizontal lines. And again, using some dry powder color (it can also be wet, but make sure is not too runny and the brush is not too wet) paint now the horizontal lines.


Here is the final product!!

Note: always remember to use the same stencil side for applying the color or you will mess up your design. If your stencil is leaving paint where you don't wan it, wash it carefully and let dry. Then it will be ready to use. 
I hope this come in handy for you!!! 

Cakey Hugs, Joly